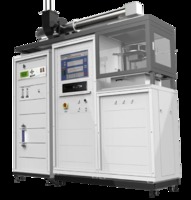
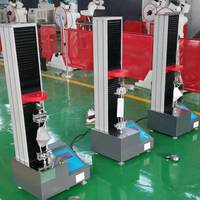
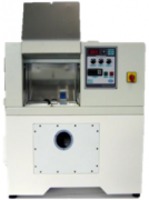
Cone Calorimeter
Product Quick Detail
- Place Of Origin
- china
- Minimum Order
- 1
- Packaging
- Packed by solid wooden case;
- Delivery
- 30 DAYS
Specifications
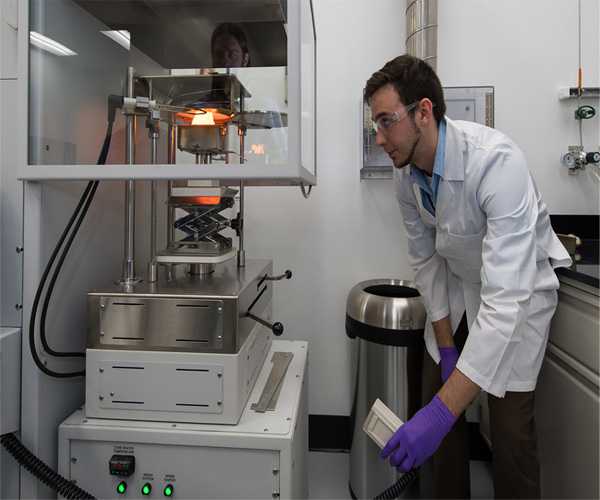
A cone calorimeter is a fire test apparatus based on the amount of heat released during the combustion process, which is directly related to the oxygen consumption in the combustion process. The amount of heat generated is directly proportional to the severity of the fire, such as the rate of fire growth. In order to obtain the flammability of the material, the material is exposed to an external radiation heat source. Therefore, since this is a forced combustion test, the cone value is generally considered to reflect the second ignitability of the ignition.
Standard:
ISO5660,ASTM E 1354, ASTM E 1474, ASTM E 1740, ASTM F 1550, ASTM D 6113, NFPA 264, CAN ULC 135, BS 476
Scope of application:
The Cone Calorimeter is the most significant bench scale instrument in the field of fire testing.
Test Principle:
A sample is placed in a "cone" shaped radiant heater. Normally, the sample is exposed to 35 kW / m2 of external flux-forming heaters. However, for more refractories the heater is often increased to 50 kW / m2. Once sufficient pyrolysis products are produced, ignition occurs. Combustion products pass through a conical heater and through an instrument discharge tube. The measured / calculated values are usually important including, but not limited to, the maximum ignition time, the mass loss rate during combustion, the maximum amount of time and heat released during combustion, the total amount released during the test.
Complete system includes:
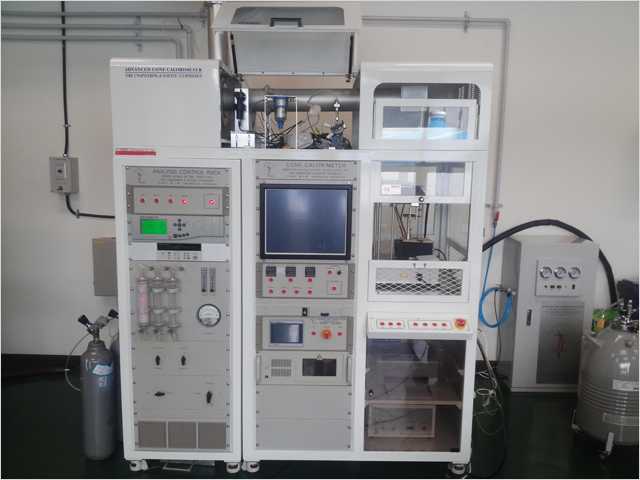
1. Conical heater - in a truncated cone, 230V, 5000W, with a heat output of 100 kW / m2
2. Test the sample device in horizontal or vertical.
3. 3 K-type thermocouple and 3 PID temperature controllers for temperature regulation
4. Opening and closing mechanism - to protect the sample area before testing to ensure that the initial quality measurement is stable, the operator can have additional time to test the system before testing. For flammable samples, if there is no opening and closing mechanism, it is easy to burn prematurely. This extra time is very important to the operator
5. Sample holder - sample size 100mm x 100mm, thickness of not more than 50mm, placed horizontally or vertically
6. Load cell - quality measurement by strain gage component test, the accuracy of up to 0.01g. Equipped with quick electronic weighing components, mechanical stop device can avoid damage caused by movement, given the stable results, to ensure that equipment longevity
7. Spark ignition - 10kV spark igniter, equipped with a safety cease-fire device. The igniter is automatically positioned by means of a lever connected to the closing mechanism
8. Exhaust system - made of stainless steel to extend life. (Flow rate adjustable from 0 g / s to 50 g / s with an accuracy of at least 0.1 g / s), and orifice flow testers (thermocouples and differential pressure transducers), including hoods, gas sample sockets and exhaust fans. Common tests are typically 24 l / s
9. Gas sampling - including particulate filter, freezing cold trap, pump, drying cylinder, flow controller
10. Oxygen analysis - paramagnetic oxygen analyzer, 0-25%, standard performance
11. Smoke fog - measured with a laser system using a photodiode, 0.5 mW helium-neon laser, primary and standby photodetectors. With positioning bracket and 0.3,0.8 neutral density filter for calibration.
12. Heat flow meter - used to set the level of radiation on the sample surface
13. The burner calibration-calibration apparatus tested the heat release rate by using 99.5% pure methane
14. DATA ACQUISITION - An Agilent wheel data collector / converter with 3-hole card slot, 6 1/2 digit (22 bit) internal DMM for 120 single-ended measurements or 48 double-ended measurements. Scan rate up to 250 channels / s with 115k baud RS232 and PCI GPIB interface. All readings are recorded automatically, with a stable reading of 50000 in the memory
15. Cone Calorimeter Software - Operating languages include English, French, German, Spanish and Japanese. The user interface is a Windows operating system with easy-to-use button operations, standard Windows data entry, drop-down options, click-to-select, and switch.
Feature:
1). Displays the instrument status.
2). Calibrate the instrument and store the calibration results.
3). Collect the test data.
4). Calculate the required parameters.
5) Display the results by the standard way.
6). Multiple tests are averaged.
7). Data entry to FDMS (Fire Data Management System) - Most European and US laboratories apply the system format, sharing data between different laboratory calorimeters.
8). the file output is in CSV (Comma Separated File) format, which can be quickly converted to a spreadsheet
Optional Configuration:
1, Carbon dioxide and carbon monoxide - available NDIR gas analyzer.
2, Hydrogen chloride - heating supply lines and gas analyzers.
3, Controlled gas accessories - for low-oxygen sample analysis.
4, the quality of the loss of calorimeter.
5, FTIR toxicity tester.
6, the protection of door-to protect the operator does not inhale poisonous samples generated by the flue gas. The steel plate blocks the rear, the exhaust hood blocks the top, and the test door blocks the bottom, protecting the door against the last side.
- Country:
- Business Type:
- Market:
- Founded Year:
- Address:
- Contact:QIAN qian
Other products from Qinsun Instruments (Shanghai) Co., Ltd.
Relate products of Cone Calorimeter
CNDIP是您信任的合作伙伴,提供最高质量,最好的价格柴油机配件.有成千上万的零件,我们有你们想要的 材料类型:高速钢 我们的优势 1.高品质,最优惠价格。 2.及时交货;确认后7天内交货。 ...
Overview of PDC Core Bit GREAT customized made Diamond core bits, which include Matrix body PDC bit and Steel body PDC bit, the Diamond core bit is used to drill an underground core (or mineral core) primarily when samples of underground rock (minerals) are required. Every pdc ...
Hard Tag Cone Pin (NO.004) Choosing the perfect pins for your tags is now easier than ever. Our collection offers a variety of options to suit your personal preference. Choose from grooved pins or smooth pins, both available for your convenience. Whether you prefer metal or ...

